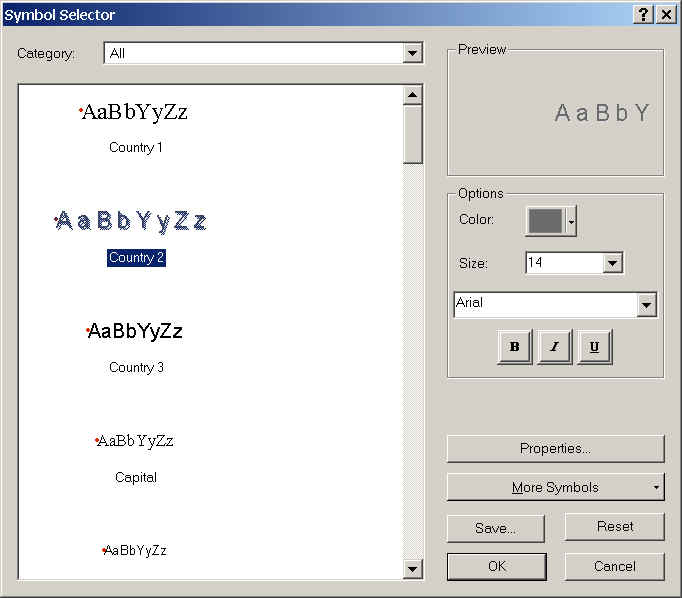
![]() When
editing a layer in ArcMap, make sure you use the Save Edits option on the Editor
toolbar to save edits as a separate process from saving your map.
When
editing a layer in ArcMap, make sure you use the Save Edits option on the Editor
toolbar to save edits as a separate process from saving your map.
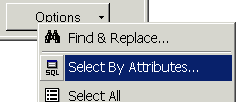
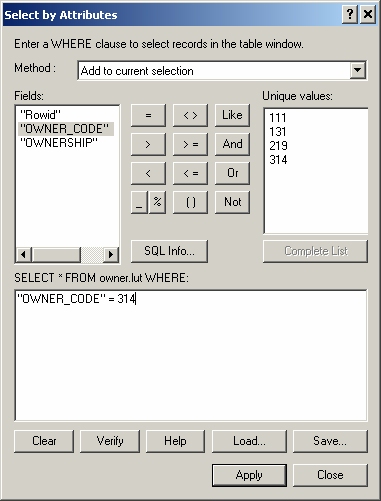
- In the Attributes of owner.lut, click the Options pulldown menu, and choose Select By Attributes...
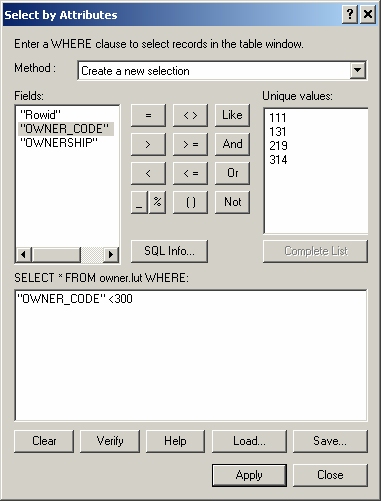
- Using selection method "Create a new selection," select all rows having a value of Owner-code less than 300 (not federal government). Create new selection essentially clears the selection before performing a new selection. You can also do this from the Option pulldown menu. You can choose query values by double-clicking them in the windows (e.g. double-click "Owner-code" to put it into the query box below).
- Don't close the query window, but click Apply. You can also test the syntax of your query before applying by clicking Verify. The selected records should be highlighted in the table.
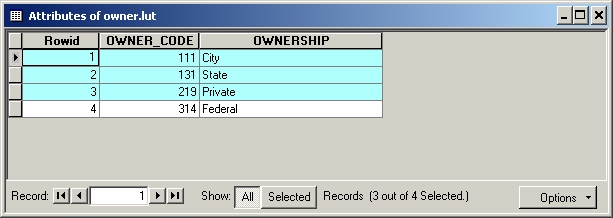
This set of rows is now your "selected set". You may take some action on this set, for example, you could delete them or edit them (don't do this now, of course).
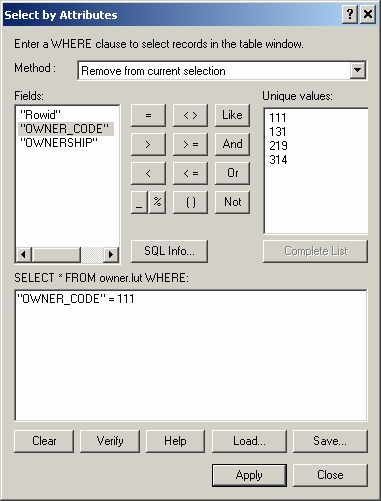
- In the Select By Attributes query window, add additional records to the "selected set" by choosing Method: Add to current selection.
- Construct a query adding Owner-code 314 to the selected set. All rows in the table should now be selected.
- Now 'unselect' the City rows by choosing Method: Remove from current selection.
- You should now have everything but rows of Owner-code = City selected. What if you only want these City rows selected? You can change the "selected set" of data to those records other than the ones selected by swapping the records in the non-selected set and the selected set. To do this:
- Close the Select by Attributes window.
- In the Attributes of owner.lut window, click the Options pulldown menu and choose Switch Selection. Now only the City rows should be selected.
- Clear the selection by choosing Clear Selection in the Options pulldown menu.
- Exit ArcMap and logout or continue on to the next part of the exercise.
TEST.PAT                           TEST.CODE

TEST-ID   DATA1                    TEST-ID  DATA4     DATA5
   1      15.1                          3     BB         91
   2      14.7                          2     AA        158
   3      12.0                          1     AB        107
   4      22.6                          4     AC        146
   .       .                                   .          .
   .       .                                   .          .
   .       .............       .................          .
   .                   .       .                          .
   .                   .       .                          .
   .......TEST-ID    DATA1  DATA4       DATA5..............

             1       15.1     AB        107
             2       14.7     AA        158
             3       12.0     BB         91
             4       22.6     AC        146
Question - Which column was used as the
field to relate the two files?
Answer - TEST-ID
2. Perform a RELATE manually (by hand) on the two tables illustrated below.
3. Examine fwseneted polygon and owner.lut to determine how they should be related.
- Examine the item definition of each file.
TESTCOV.AAT FNODE# TNODE# LPOLY# RPOLY# LENGTH TESTCOV# TESTCOV-ID 37 107 0 0 20.9 163 45 105 154 0 0 12.7 164 46 35 91 0 0 17.2 165 47
TESTCOV.TABLE TESTCOV-ID NAME ORDER MEAN-WIDTH 46 NORTH RIVER 3 345 45 WEIR RIVER 3 767 47 DUXBURY RIVER 2 201
- Manually join (relate) the two files based upon the item in common, write out the results of the operation, and hand-in to your lab instructor by next period.
- In ArcCatalog, examine the fields and data in fwseneted polygon.
Do the same for the fields and data in owner.lut.
Question - What is the common item in the two files?Answer - The common item is Owner-code. This is why we made them the same. The fields must have the same configuration (type, width, etc) in order to relate to each other.
4. Temporarily relate the two files fwseneted polygon and owner.lut.
Question - Why do you want to relate these two files?Answer - Because you want to "link" the spatial data in fwseneted polygon with the non-spatial attribute data in owner.lut.
- Open an ArcMap map that has fwseneted polygon and owner.lut added to the table of contents.
- Right mouse-click fwseneted polygon, choose the Joins and Relates pulldown and select Relates....
Input the appropriate parameters to set up the relate and click OK.
Look at the two tables in ArcMap.
Question: Did anything change?
Answer: Not in the tables!
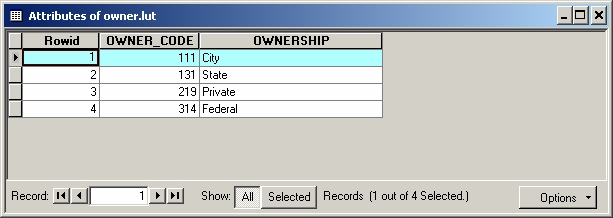
We have constructed a relate. However, we have not yet accessed it from a table. You can tell because if you select a row from either table, rows are NOT selected in the related table. To access the relate, activate the Attributes of Owner.lut window and highlight (select) the State ownership row by clicking on the far button (shown as an arrow here).
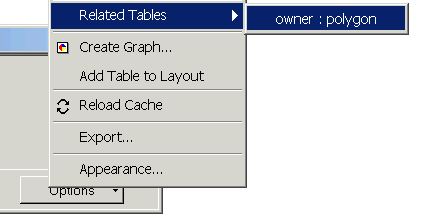
From the Options pulldown menu choose Related Tables and select the owner:polygon relate.
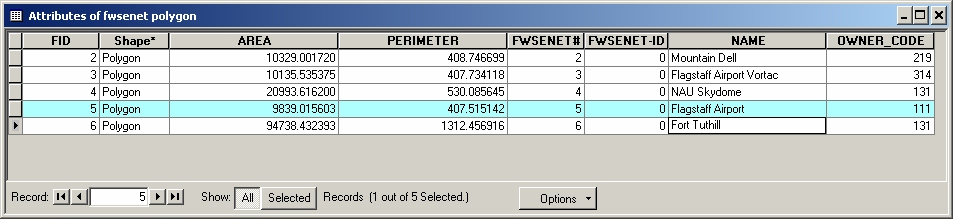
You should now see the related rows (State ownership) selected in the related table (fwseneted polygon). This is an example of a many to one relationship (many features - polygons - have one related attribute).
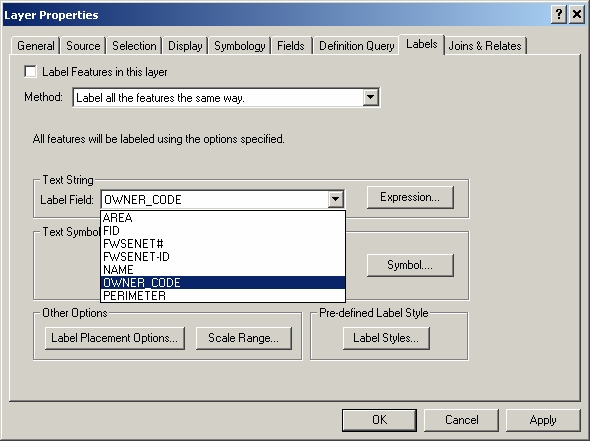
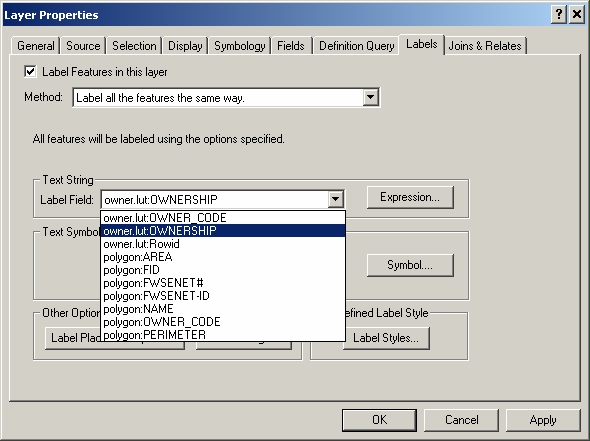
Now that you have found all the polygons owned by the State, you could perform some function with them. However, there are some functions that are unable to access the related values. For example, you can't use them to label the fwseneted polygon layer. To demonstrate this, right mouse-click the layer and choose Properties.
Choose the Labels tab in the Layer Properties window and look at the fields available to label polygons listed in the Label Field pulldown menu. The OWNERSHIP field is not available. Label the polygons using OWNER-CODE.
Are these labels very informative? In order to have the values available for labeling (and other functions), you must "physically" join the attributes of the look up table to the feature attribute table.
2. Start ArcMap and open the map with fwseneted polygon and owner.lut
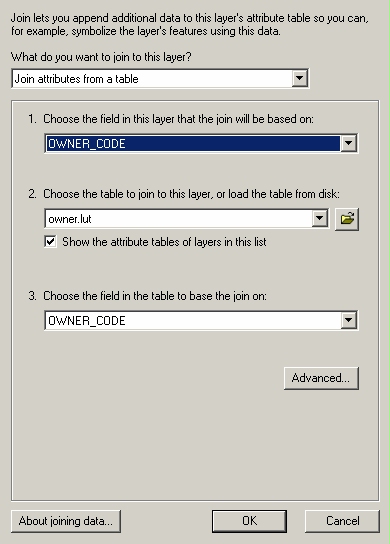
3. Determine the appropriate parameters for each argument in the Join function.
- Right mouse-click fwseneted polygon and from the Joins and Relates pulldown choose Join...
- In the first Join window you can either join attributes from a table to the coverage or join attributes from a layer based on spatial location. We want to join attributes from a table.
- Choose the OWNER-CODE field in the first layer, the owner.lut as the join table, and OWNER-CODE as the join field.
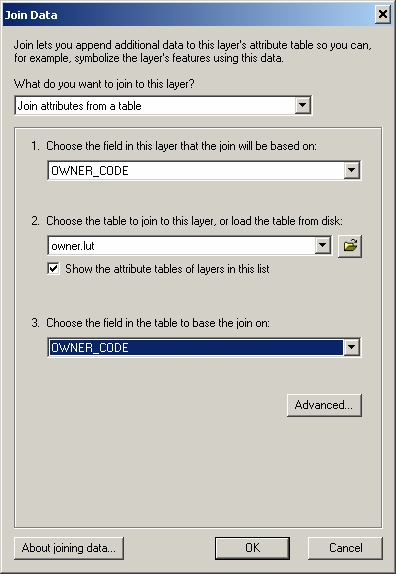
4. Click OK and then open the fwseneted polygon table.
You should see that all the fields from the owner.lut have been added to
the fwseneted polygon table. Now you have the attributes connected to the
table, which would allow you to use them for processes like labeling polygons
based on the OWNERSHIP field values.

5. Label polygons based on the joined OWNERSHIP field
values.
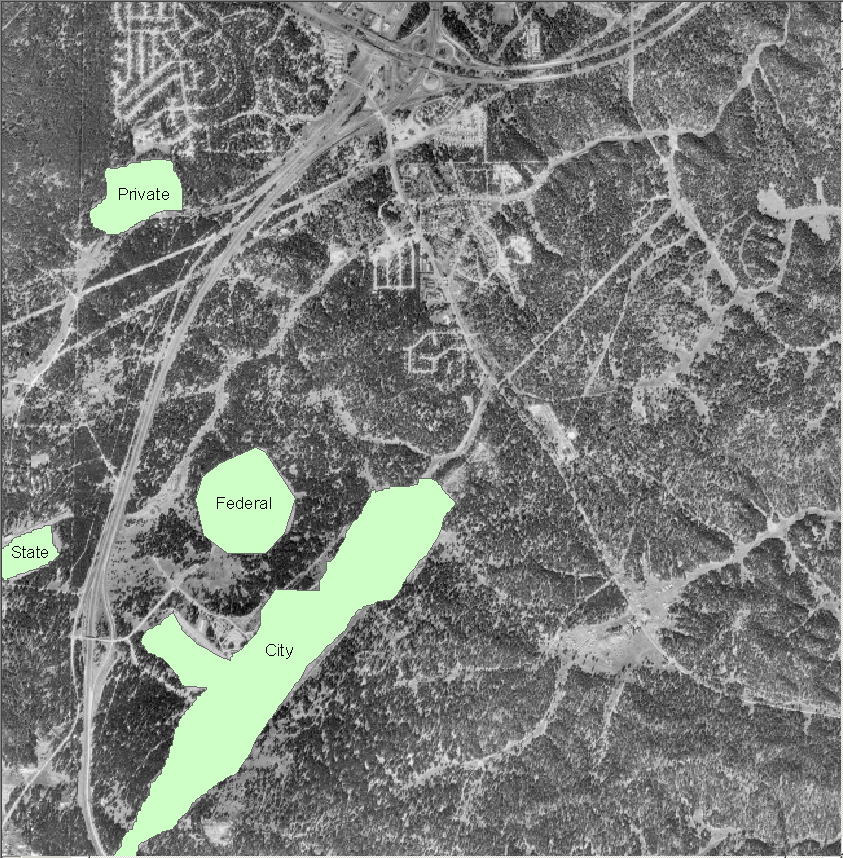
6. Make a layout showing your polygons with the ownership labels, and hand it in to your TA.
7. Exit ArcMap. Clean up your workspace in ArcCatalog by deleting unwanted coverages and files. Exit ArcCatalog and logout.